Forest
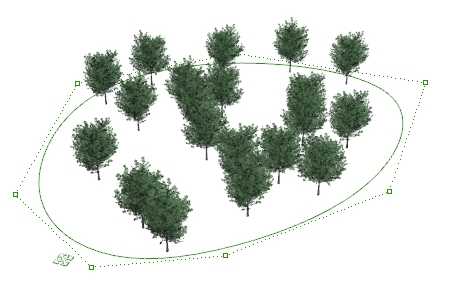
Forests arrange Lands Design Plant elements inside a boundary curve.
Insert a forest
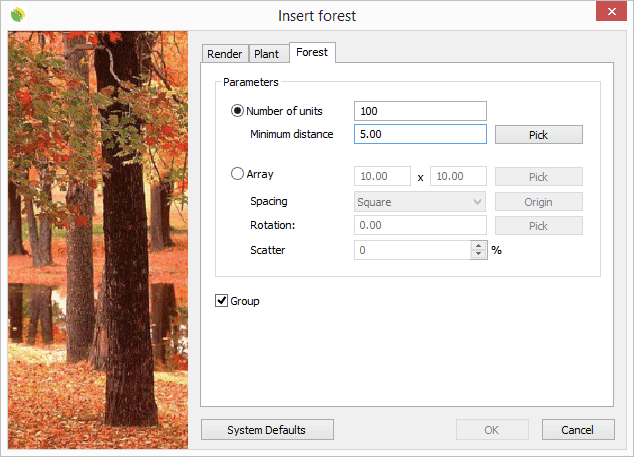
After running the laForest command, the Forest insert dialog box will appear. This dialog shows the basic options of the Forest object in different tabs:
- Forest: parameters of the forest.
- Plant: parameters of the plant species items in the forest.
- Format: format of the plant species in the forest.
- Render: parameters that will define how plant species in forests will look like in render views.
Steps:
- Select a plant species from the list, under the Plant tab. Click on the Browse... button to select a new one from the Plant Database. Select the rest of the plant parameters.
- Switch to the Forest tab, and select the Forest parameters. Click OK to close the dialog.
- Select one or more boundary curves, hatches, regions (in AutoCAD), or zones that will be used to define the forest's limits, or draw it through any of these options in the Command line:
- Polyline
- Spline
- Circle
- Arc
- Rectangle
- Press ENTER, ESC or right click to end the command.
Note 1The boundary curve selected or drawn in the model doesn't need to be closed or planar.
Note 2When selecting more than one boundary curves (or hatches, regions or zones), the plants will be distributed into these different areas, but will remain within the same forest object.
The forest parameters can be edited while they are being inserted and after finishing the command, from the Lands Design Edit panel, in the Properties section, under the Forest tab.

Insert dialog box for the Forest object
Control Points 
Forests have the same control points as the curves used to generate them, regardless of the number of plant items or their position.
In addition, they have a Move control arrow to move the whole forest object.
Forest control points are automatically enabled when selecting forests one by one. To turn one ore more forest object control points on, just select the forests and run the PointsOn command (or press F10). To turn the points off, press the ESC button or run the PointsOff command.

Control points on forests
Insert Options and Parameters
The forests insert options and parameters are divided in different tabs, and are available from different dialogs:
- Forest insert dialog box (only available when inserting a new forest).
- Forest properties section, in the Lands Design Edit panel.
- Object Properties dialog.
- Properties Explorer dialog.
The General, Format, Render and Plant tabs are common to the Plant object.
Forest
There are two options to arrange plants in forests:
- Number of units: distributes randomly a total number of plant items inside the boundary curve. You can specify the Minimum distance among plant items. You can change the random distribution from the Edit section in the Control Panel: Forest > Redistribute.
- Array: arranges the plant species spaced in columns and rows.
- Spacing: square, rectangular, triangular equilateral and isosceles.
- Rotation: the whole forest object rotates from its central point.
- Scatter: displaces the plant species from the array grid points.
Forests can combine different plant species:
- # of elements: type the number of different plant species. The list of different species will appear in the Object Selection List in the Lands Edit panel, from where they can be selected to edit their parameters.
- Distribution: options to distribute the plant species when there are more than one type.
Inserted units: displays the exact number of plant units in the forest. When the Forest is arranged in the Number of units mode, the total amount of plant units will depend on the minimum distance among them.
Edit options
These are the edit options for the forest object, available in the Edit area of the Edit panel:
 Update
 Ungroup
- Copy properties from another object.
- Adjust
- Don't adjust to terrain
- Forest
- Redistribute
- Add hole: command to subtract a boundary from the forest
- Randomize
- Plant
 Edit species
 Tag. (This command only appears when the plants in the forest have no tag assigned.)
 Identify label (This command only appears when there is a plant label referencing the plant species in the forest object.)
 Insert photo
Forests graphical display
Plant species in forests have the same graphical display as plants species inserted individually. The plant species graphical display in forests can be changed in the Document properties.
 left click