Plant Photo
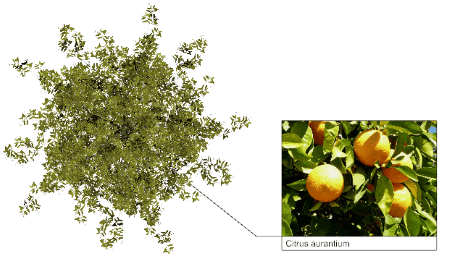
The plant photo command creates a label with an image loaded from the cloud, and draws a leader pointing to the referenced plant.
- Insert a plant photo
- Change the image of a plant photo
- Plant photo control points
- Insert options and parameters
- Edit options
- Graphical display
Insert a plant photo
Steps:
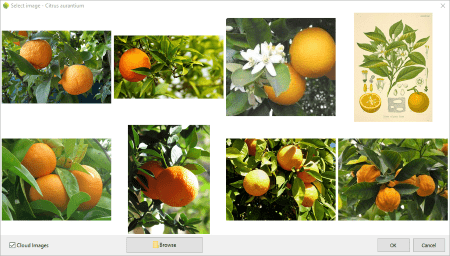
- After running the laPlantPhoto command, select a plant object in the model. Press ENTER, or right-click. The Select Image dialog will appear.
- Select one of the images displayed in the dialog, searched from the cloud.
- Left-click in the model to specify the insert point of the plant photo corresponding to the bottom left corner.
- Left-click to determine the size of the plant photo, corresponding to its top-left or bottom-right corner.
NoteIt is necessary to have Internet connection and the Cloud Images check-box enabled (in the bottom-left corner of the dialog), otherwise the dialog will just display the images of the plant species that come with the plant database.

Select image dialog
Change plant photo
Once the plant photo has been inserted, you can change the image.
Steps:
- Select a plant photo in the model. The Select image dialog will appear.
- Select one of the images displayed in the dialog, loaded from a Google search. Click OK to close the dialog.
The former image will be replaced by the new one.
Control points 
Plant photos have control points at the bottom-left corner of the photo. The arrow pointer keeps linked to the referenced plant species position.
To turn the plant photo control points on, run the PointsOn command (or press F10) and select the plant photo. To turn the points off, press ESC or run the PointsOff command.

Plant with a photo
Parameters
The plant photo insert options and parameters are divided in different tabs, and are available from different dialogs:
- Plant photo properties section, in the Lands Design Edit panel.
- Object Properties dialog.
- Properties Explorer dialog.
General
General attributes for the plant photo: Name, Color, Layer, and Transparency (only visible in Conceptual display mode).
Photo
Image settings:
- Image Height / Width
- Text attributes
- Border
- Leader: when this button is enabled, a new tab appears with the leader settings.
Leader
- Line: parameters of the leader line
- End: parameters of the leader pointer
Edit options
These are the edit options for the plant photo object, available in the Edit area of the Edit panel:
 Update
- Copy properties from another object.
- Adjust
- Don't adjust to terrain
- Plant photo
- Edit image with: option to edit that photo with an image editor application installed in your PC
Graphical display
The plant photo only has a 2D representation and it is visible with any display mode.
 left click